gil.KOREA

Buseoksa Temple: a climb through courtyards to a mountain view
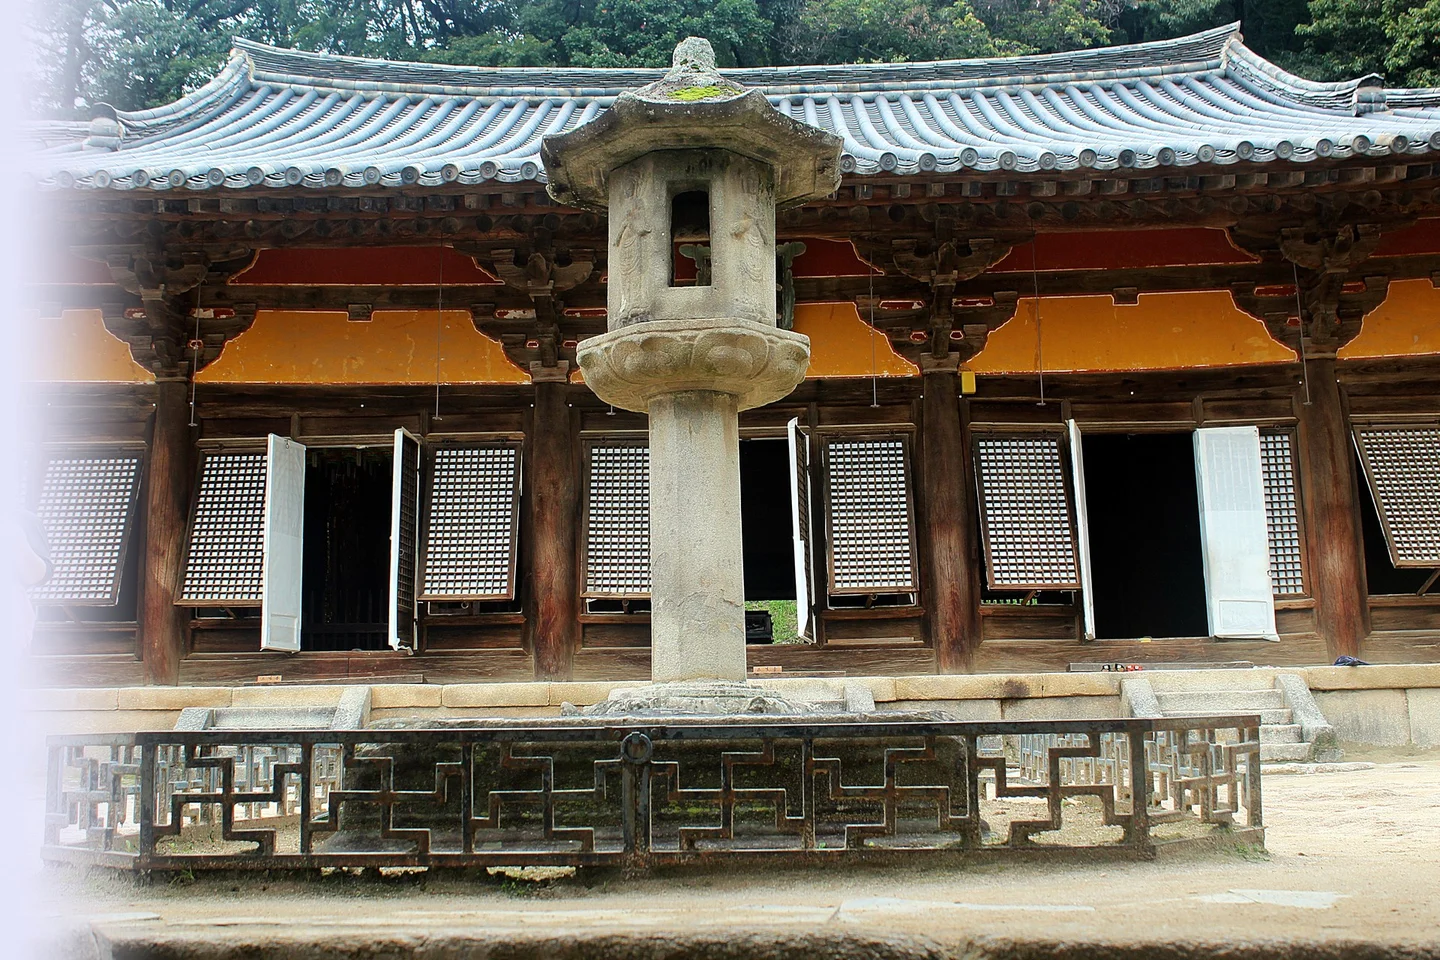
Stone lantern and main hall in front of Muryangsujeon Hall

최옥석 · Original · CC BY-SA 4.0 ·

Source notices and processing details

Stone lantern and main hall in front of Muryangsujeon Hall

Photo: 최옥석 · commons.wikimedia.org — 부석사 무량수전앞 석등.jpg · CC BY-SA 4.0

WebP conversion; proportionally reduced where needed; no cropping or upscaling.

Processed copies are provided under the same license shown above.

CC BY-SA 4.0 https://creativecommons.org/licenses/by-sa/4.0 · 저작자 표시 필수 · 동일조건변경허락(변경 시 같은 라이선스)

360 × 240: Existing supplied proportional WebP rendition; no new crop, resize, upscaling, distortion or synthesis in this connection batch.

720 × 480: Existing supplied proportional WebP rendition; no new crop, resize, upscaling, distortion or synthesis in this connection batch.

1440 × 960: Existing supplied proportional WebP rendition; no new crop, resize, upscaling, distortion or synthesis in this connection batch.

The approach to Buseoksa is part of the attraction. Instead of arriving in a single open courtyard, you climb through gates and past pavilions, gaining a little height with each stone terrace. At the top, Muryangsujeon Hall faces a sweep of hills. The reward is both an extraordinary old wooden building and the way its setting unfolds around you. This is one of the seven temples included in UNESCO’s Sansa, Buddhist Mountain Monasteries in Korea World Heritage property. For a visitor, that designation is best understood on foot: the buildings work with the mountainside, and religious life continues within them. Buseoksa is especially worthwhile if you enjoy architecture, landscape, or a slower day outside Korea’s big cities. Allow roughly two hours on the grounds as a starting point for planning, with more time for a leisurely visit. From central Yeongju or Punggi, leave a half day for the outing once transportation is included. The repeated stairs matter more than the distance on a map; this is a temple to approach gradually rather than a quick roadside stop.

Getting there from Yeongju or Punggi
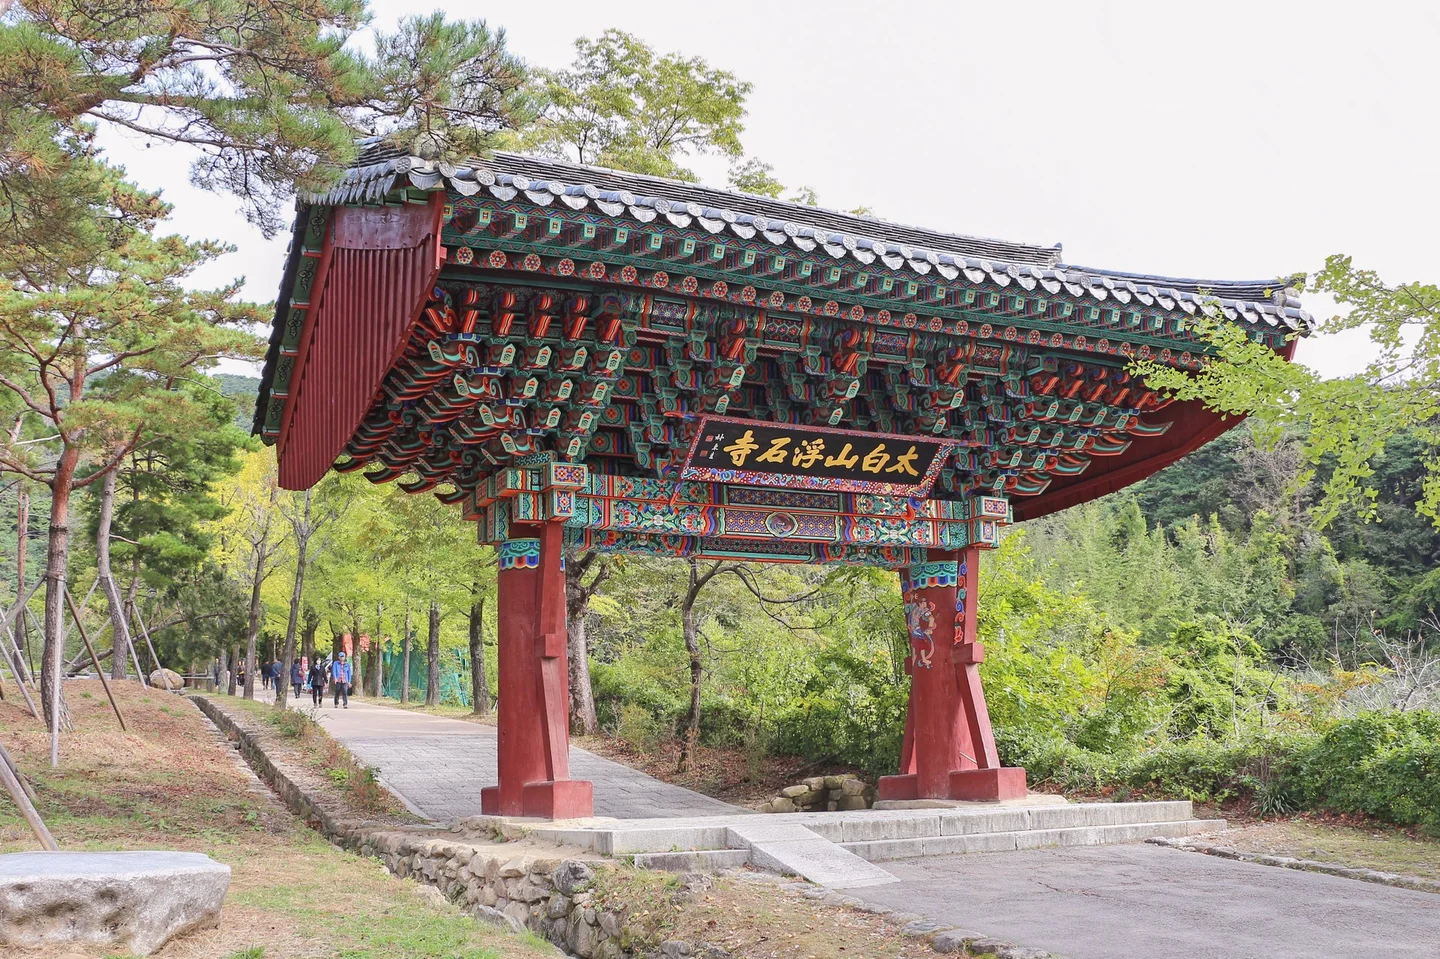
Iljumun Gate with a signboard reading “Taebaeksan Buseoksa”

Bernard Gagnon · Original · CC0 1.0 ·

Source notices and processing details

Iljumun Gate with a signboard reading “Taebaeksan Buseoksa”

Photo: Bernard Gagnon · commons.wikimedia.org — Iljumun at Buseoksa.jpg · CC0 1.0

WebP conversion; proportionally reduced where needed; no cropping or upscaling.

CC0 http://creativecommons.org/publicdomain/zero/1.0/deed.en · 저작자 표시 불필요(권장)

360 × 240: Existing supplied proportional WebP rendition; no new crop, resize, upscaling, distortion or synthesis in this connection batch.

720 × 480: Existing supplied proportional WebP rendition; no new crop, resize, upscaling, distortion or synthesis in this connection batch.

1440 × 959: Existing supplied proportional WebP rendition; no new crop, resize, upscaling, distortion or synthesis in this connection batch.

Use Buseoksa in Yeongju, Gyeongsangbuk-do, as your destination. The temple stands on the slopes of Bonghwangsan, well outside the city center. Punggi is a useful rail gateway for an itinerary that also includes the Sunheung area, while Yeongju offers another base. In either case, check the connection between your train arrival and the temple-bound local bus. Yeongju’s bus table, checked in October 2026, lists route 27 through Punggi and Sunheung to Buseoksa. Route 55 also has temple services from Yeongju, but some departures on that numbered route have other destinations. Look for the temple destination, not just the bus number. The city’s timetable uses the Yeongju Yeogaek departure point; do not assume every listed departure is from Yeongju railroad station. Check the return service before walking uphill from the arrival area. Services are spaced far enough apart that knowing the next departure can shape how long you spend at the upper halls. If using a taxi for one leg, arrange the pickup location and time before heading into the temple. The broad path through Iljumun, the first gate, begins the transition from the visitor area into the monastery. From here, the route rises toward successive terraces. Accessible parking and a restroom are listed in Korea Tourism Organization information, but those facilities do not establish a step-free route through the upper temple.

Climbing toward Anyangnu
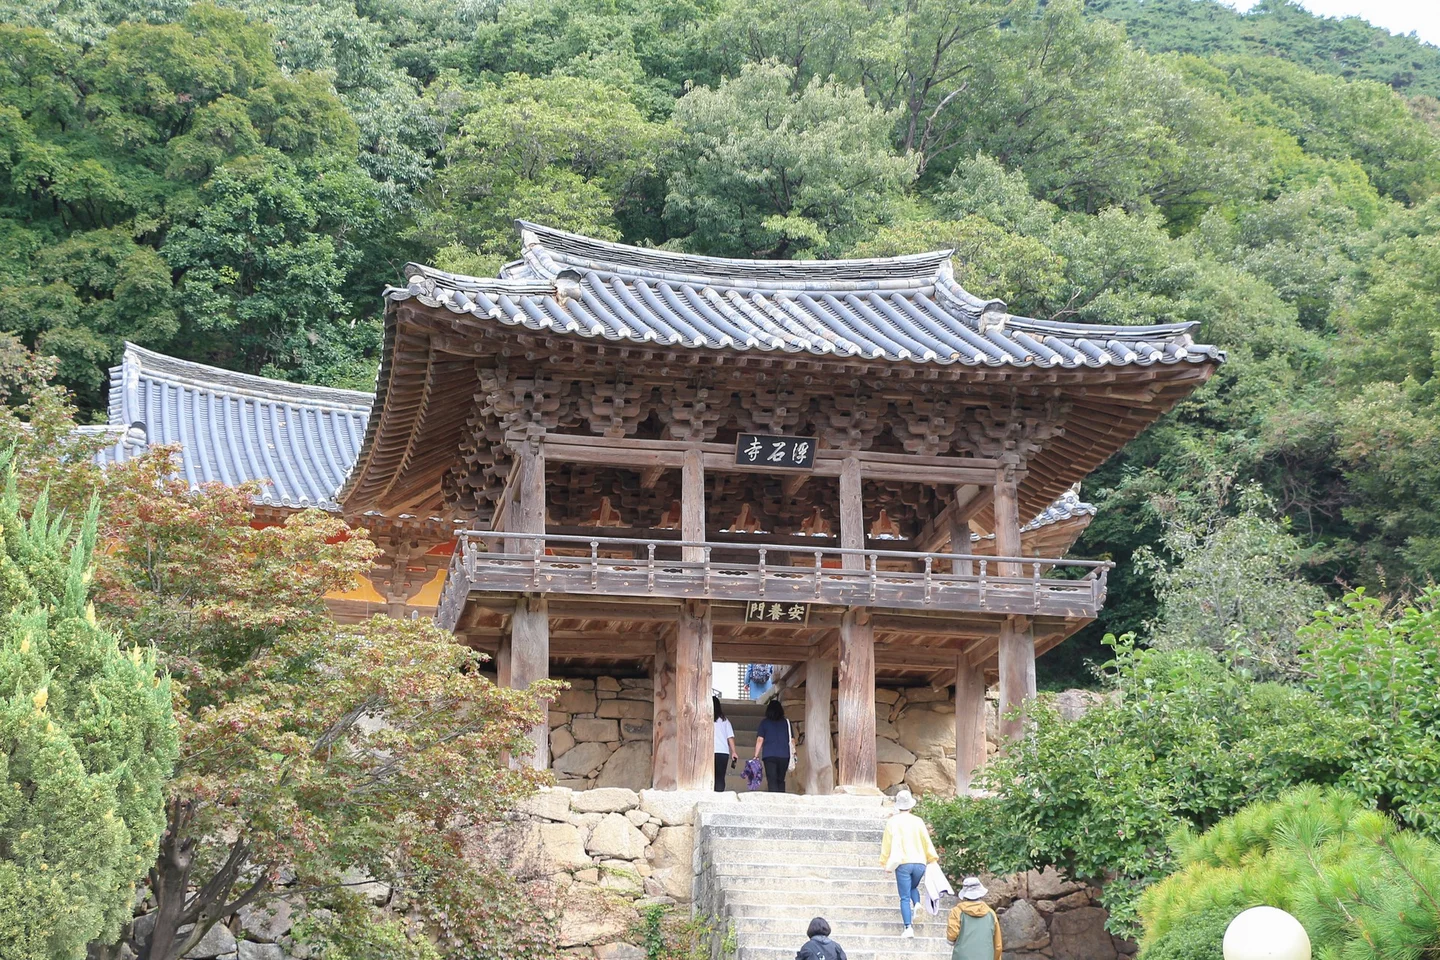
Anyangnu Pavilion at Buseoksa above stone steps

Bernard Gagnon · Original · CC0 1.0 ·

Source notices and processing details

Anyangnu Pavilion at Buseoksa above stone steps

Photo: Bernard Gagnon · commons.wikimedia.org — Anyangnu at Buseoksa 01.jpg · CC0 1.0

WebP conversion; proportionally reduced where needed; no cropping or upscaling.

CC0 http://creativecommons.org/publicdomain/zero/1.0/deed.en · 저작자 표시 불필요(권장)

360 × 240: Existing supplied proportional WebP rendition; no new crop, resize, upscaling, distortion or synthesis in this connection batch.

720 × 480: Existing supplied proportional WebP rendition; no new crop, resize, upscaling, distortion or synthesis in this connection batch.

1440 × 960: Existing supplied proportional WebP rendition; no new crop, resize, upscaling, distortion or synthesis in this connection batch.

The sequence of buildings gives the climb a rhythm: a gate, a stretch of path, a pavilion, then another change of level. Beomjonggak and Anyangnu help frame the approach to Muryangsujeon. The layout does not follow one perfectly straight axis; the buildings shift with the terrain. Those small changes keep the next courtyard partly concealed until you reach it. At Anyangnu, pause below the raised pavilion before continuing up. The timber structure, stone stairs, and roof above form a distinct threshold into the upper precinct. Once you emerge, turn around. The view back over the lower roofs and out toward the mountains is as important as the view ahead toward the main hall. Early or late daylight can make the depth of the surrounding ridges easier to see, though clear visibility depends on the weather. A cloudy visit still offers plenty to look at close up: stone retaining walls, the underside of a roof, and the changing relationship between each building and the slope. Choose a daylight visit with enough time to descend comfortably and catch your onward transportation.

Muryangsujeon and its stone lantern

Buseoksa traces its foundation to the monk Uisang in 676. The buildings you see today belong to different periods. Muryangsujeon was rebuilt in 1376 and is among Korea’s oldest surviving wooden halls, while the stone lantern in its courtyard dates to Unified Silla. The pairing brings together two very different kinds of craftsmanship: a broad timber structure and a carefully proportioned stone object. Start with the hall’s outline. Its low, wide roof extends beyond the columns, creating a deep band of shade. The columns swell subtly before narrowing again toward the top, an effect known as entasis. Moving closer makes this easier to recognize than viewing the facade from the far side of the courtyard. The stone lantern provides a smaller-scale focus before the hall. Look at the stacked base, the central shaft, and the chamber beneath its stone roof. Then step back to see how the lantern and building occupy the same terrace. Keep to the visitor space around the protective boundary. Muryangsujeon is dedicated to Amitabha Buddha. If the hall is open for visitors, its interior is worth a quiet look: the main image faces east from the western side, rather than facing directly toward the front entrance. Follow the posted entry instructions and leave worshippers room to pray.

The floating rock and the temple’s name
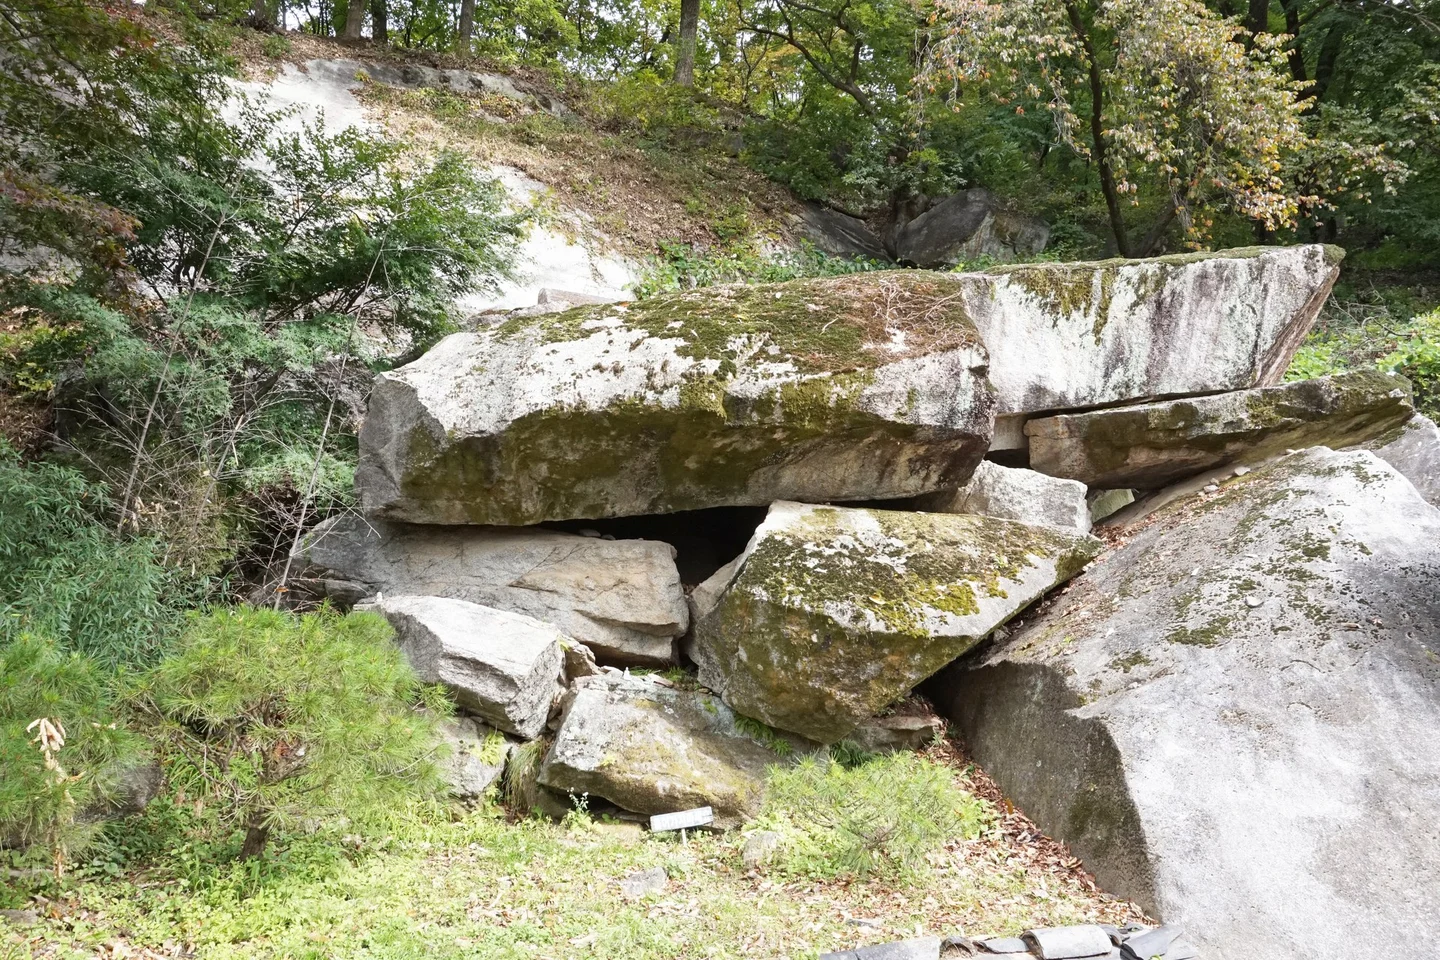
Floating stone beside Muryangsujeon Hall

Bernard Gagnon · Original · CC0 1.0 ·

Source notices and processing details

Floating stone beside Muryangsujeon Hall

Photo: Bernard Gagnon · commons.wikimedia.org — Buseok Rock.jpg · CC0 1.0

WebP conversion; proportionally reduced where needed; no cropping or upscaling.

CC0 http://creativecommons.org/publicdomain/zero/1.0/deed.en · 저작자 표시 불필요(권장)

360 × 240: Existing supplied proportional WebP rendition; no new crop, resize, upscaling, distortion or synthesis in this connection batch.

720 × 480: Existing supplied proportional WebP rendition; no new crop, resize, upscaling, distortion or synthesis in this connection batch.

1440 × 960: Existing supplied proportional WebP rendition; no new crop, resize, upscaling, distortion or synthesis in this connection batch.

To the west of Muryangsujeon lies the rock associated with the name Buseoksa, often translated as “Temple of the Floating Stone.” Layers of stone and the gaps beneath them give the formation its distinctive appearance. Finding this modest landmark adds a different scale to the visit after the large roofs and distant views. The temple’s founding stories connect Uisang with Seonmyo, a woman said to have protected him and helped establish the monastery. Treat the floating-stone story as part of the place’s Buddhist tradition. You can enjoy that association while also looking closely at the actual boulders, weathered surfaces, and moss. Josadang, the hall associated with Uisang, lies farther uphill. Add it if you want to extend the walk beyond the main terrace. If stairs are becoming tiring, the main hall, lantern, and nearby rock already provide a coherent introduction to Buseoksa’s architecture and history.

The view on the way down
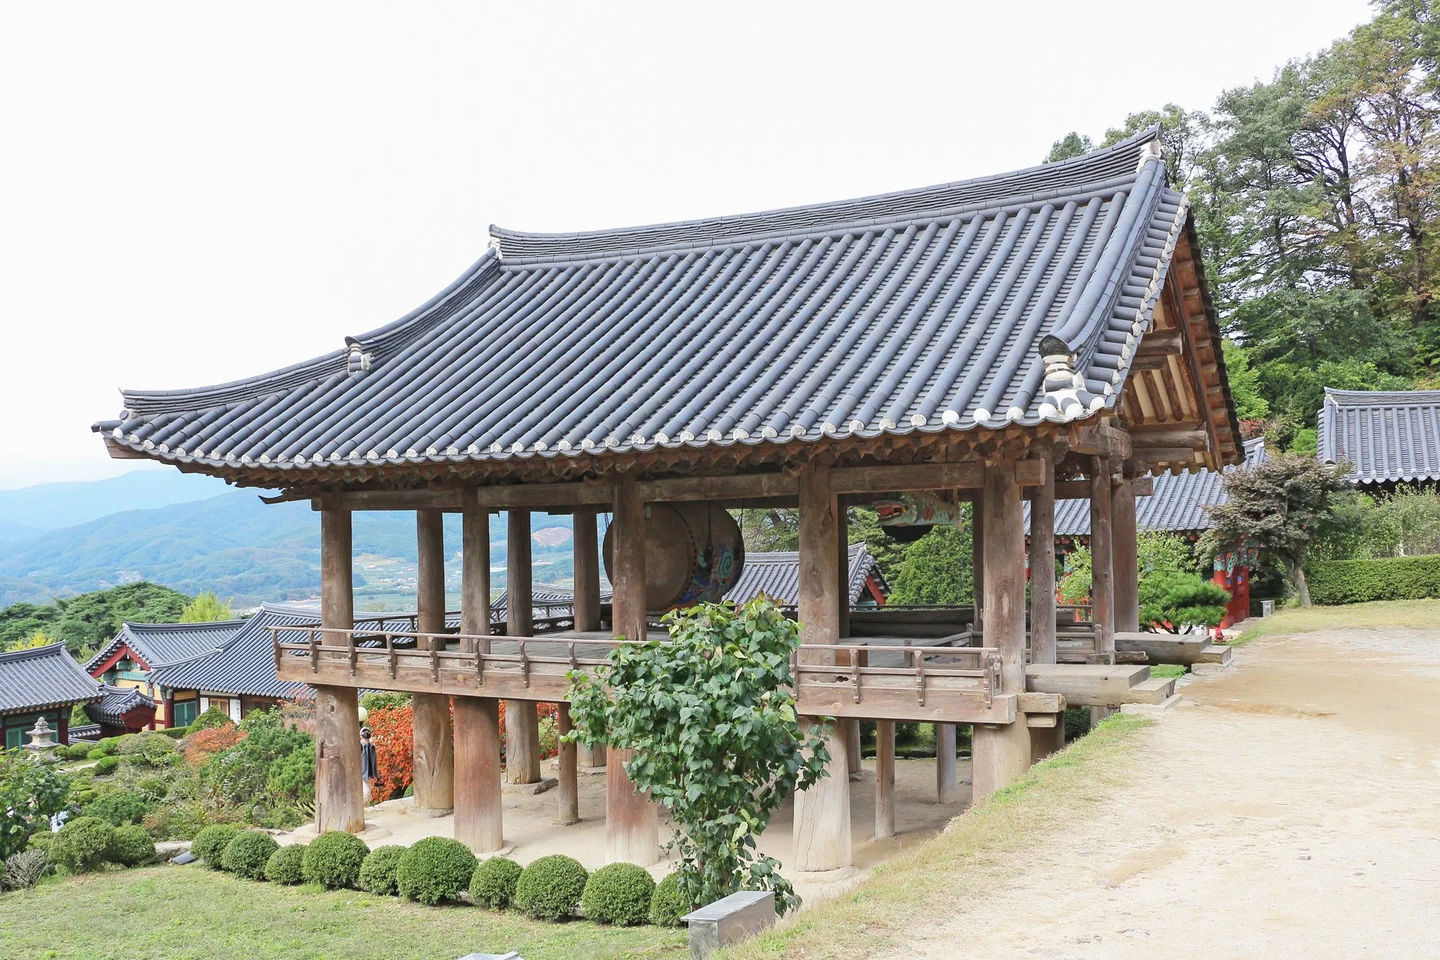
Beomjonggak Bell Pavilion at Buseoksa and the mountain ridge behind it

Bernard Gagnon · Original · CC0 1.0 ·

Source notices and processing details

Beomjonggak Bell Pavilion at Buseoksa and the mountain ridge behind it

Photo: Bernard Gagnon · commons.wikimedia.org — Beomjongnu at Buseoksa 02.jpg · CC0 1.0

WebP conversion; proportionally reduced where needed; no cropping or upscaling.

CC0 http://creativecommons.org/publicdomain/zero/1.0/deed.en · 저작자 표시 불필요(권장)

360 × 240: Existing supplied proportional WebP rendition; no new crop, resize, upscaling, distortion or synthesis in this connection batch.

720 × 480: Existing supplied proportional WebP rendition; no new crop, resize, upscaling, distortion or synthesis in this connection batch.

1440 × 960: Existing supplied proportional WebP rendition; no new crop, resize, upscaling, distortion or synthesis in this connection batch.

The descent gives the lower pavilions a second role: their roofs become part of the mountain view instead of barriers concealing the next courtyard. Around the bell pavilion, look for the large ritual instruments and the open sides that let the landscape enter the building. This is a good place to slow down before returning to the entrance area. Sosu Seowon, the Confucian academy in Sunheung, is the most useful additional cultural stop to consider on the Punggi-side route. It offers a different kind of setting, with study halls and an emphasis on scholarly life. Check actual bus connections before committing to both places in one day. Do not build that combined itinerary around a visit inside nearby Seonbichon. Its official notice, checked in October 2026, says village visits and traditional-house experiences are suspended for renovation until work is complete. Sosu Seowon has its own admission arrangements; plan the academy visit separately, then leave enough time for the onward journey to Punggi or Yeongju.

SourcesUNESCO World Heritage listing directly read: seven Sansa monasteries including Buseoksa, continuing religious life and mountain setting: https://whc.unesco.org/en/list/1562 National Institute of Korean History main text directly read: foundation, terrain-sensitive axes, approach sequence, entasis, east-facing Amitabha, Uisang and Seonmyo tradition: https://contents.history.go.kr/play/view.do?levelId=tt_b96 KTO accessible tourism page updated July 7, 2026 directly read: Yeongju location, 676 foundation, 1376 hall rebuilding, floating rock west of hall, accessible parking and restroom; no complete step-free route inferred: https://access.visitkorea.or.kr/ms/detail.do?cotId=ecdce7c5-9faa-4bf4-b28d-a15ad35238d4 Yeongju heritage page directly read via TinyFish: main hall Goryeo, stone lantern Unified Silla, Josadang and Amitabha image: https://www.yeongju.go.kr/open_content/village/buseok/page.do?mnu_uid=868 City local bus table directly read via TinyFish October 12: route 27 via Punggi and Sunheung, route 55 includes different destinations; Yeongju departure location is Yeongju Yeogaek, not presumed railroad station: https://www.yeongju.go.kr/open_content/main/page.do?mnu_uid=4098 Official Seonbichon homepage notice directly read via TinyFish: visits and traditional-house experiences suspended from November 12, 2025 until renovation completion; newer notice takes priority over generic footer hours: https://www.yeongju.go.kr/sunbichon/main.do Temple operator attempted via TinyFish returned 522; no current temple opening hours, entry fee or pet policy claimed from it: http://www.pusoksa.org 확인일: 2026-10-12 (Asia/Seoul). 기본 근거: gyeongbuk-daegu-020 한국어 완료 원고의 사실·선택 사진. 영어는 독립 구성·집필. 2026-10-25 최종 검수: 공식검색수신27(풍기·순흥)·55(진우·상석)노선 일치.28은 공공형 주말/공휴일관광노선이라 중국어2본문에 누락조건추가. 부석사식당 시메뉴2인분/1인분 구분확인(최소주문으로단정안함). 소수서원 공식검색 11~2월09~17 및입장16시까지 확인. 기지떡KTO원문 직접확인, 전통조리설명과개별상품성분구분. 영주시직접접근은방화벽차단이므로 검색수신을 직접조회로표현하지않음. https://www.yeongju.go.kr/open_content/main/page.do?mnu_uid=4098 https://www.yjkhyo.kr/khyo/page.do?mnu_code=KMN0106 https://www.yeongju.go.kr/open_content/main/page.do?mnu_uid=1521&srchBgpUid=42 https://www.yeongju.go.kr/open_content/tour/page.do?cmd=2&code_uid=262&con_uid=1783&mnu_uid=10770 https://korean.visitkorea.or.kr/detail/rem_detail.do?cotid=4c5d3ef5-1f7d-4f1c-b507-0988944d85b7 https://www.yeongju.go.kr/open_content/sosuseowon/page.do?mnu_uid=3334 https://www.yeongju.go.kr/open_content/sosuseowon/page.do?mnu_uid=3348&parm_bod_uid=1220361&step=258

Travel guide